Sunday, November 30, 2014

Vintage Mirror Look

I do love pinterest.  This is were the information for this project came from: 

http://tatertotsandjello.com/2013/10/pottery-barn-christmas-mirror-knock-project.html

I would reference this for the font styles for your silhouette cameo.

I started at the thrift store to get some frames.  I found two, one that would need to be painted, one that was perfect the way it was.  Then I was off to home depot to get spray paint.

Separate the glass and the frame.  If you need to paint the frame do that.  Then using your Looking Glass Spray Paint and a used a gold metallic or silver I spray painted first with the silver or gold right on to the glass.  I did a light spray on the corners of the glass, and a light spray in the center.  Let dry about 1 minute.  Now you are ready for the Looking Glass spray paint.  Spray the whole glass.  Do about two coats and let dry. 
 
 
As it starts to dry, you can see the color change.


Now it is time for the Silhouette Vinyl Portion.  I would reference the above website for her fonts.  She did a grab job explaining!


Happy Crafting! Amanda

Friday, November 4, 2011

Whats for Dinner? Ask A Linemans Wife


Yummy Lettuce Wraps

I have a 5 year old and a 2 year old. The 5 year old ate her 5 bites and loved the rice. The 2 year old LOVED it and ate two more! The parents well we loved it. My friend has 4 boys and they all loved this for dinner.

Wednesday, October 5, 2011

Pumpkin Cream Cheese Muffins but they are really a Cup Cake!


Thanks to Annalisa(click for recipe) for this yummy treat I made it this weekend.
I made a few changes to the recipe
It calls for 2 cups Pumpkin I just put in 1 15oz can
I added Oatmeal to the topping
and to be honest drizzle more cream cheese frosting on the top!
SO GOOD!

Monday, October 3, 2011

Halloween Games! Mini Bowling with Skeleton Heads


Found the skeleton heads at The Dollar Store, thought to myself hmmmmm this could be a fun game.
 Kick bowling it is! We have a "Blood Red Soccer Ball" and watch the heads roll.

Saturday, October 1, 2011

Little Mr S Birthday Cake

I love to make yummy food over conference weekend and this is one of our families favorites.
Thanks to Picky-Palate.com for this yummy treat


The Ultimate Chocolate Layered Reeses Peanut Butter Cup Birthday Cake


1 box Pillsbury Devils Food Cake Mix
4 large eggs
1/2 Cup canola oil
1/2 Cup water
8 oz sour cream
1 small box instant chocolate pudding mix
1 bag mini or regular chocolate chips
_____________________
4 8oz packages softened cream cheese
2 sticks softened butter
16 oz bag powdered sugar (most of it)
_____________________

1 Cup melted creamy peanut butter
1 bag of Reeses Peanut Butter Cup minis, halved (freeze bag for an hour before cutting, it’s much easier)

1. Preheat oven to 350 degrees F. In a stand or electric mixer add the cake mix, eggs, oil, water, sour cream, pudding mix and chocolate chips. Beat until well combined, about 1 1/2 minutes. Will be thick. Pour evenly into 2 well greased 9 inch cake pans. Bake for 30-35 minutes or until toothpick comes out clean from center of cakes. Let cool completely.

2. To prepare cream cheese frosting place softened cream cheese and butter into a mixing bowl, beat on med-high speed until creamy smooth. Slowly beat in powdered sugar until a good spreading consistency forms. I used almost the entire bag of powdered sugar. Refrigerate for a good hour before frosting.

3. Turn cakes onto wax paper and with a large serrated knife cut each cake in half width wise to form 4 layers. Place one layer onto a cake stand and drizzle melted peanut butter over top. Next spread a generous amount of cream cheese frosting over that. Place another cake layer on top and repeat peanut butter and frosting until top layer is placed. Spread remaining frosting over entire cake then top with halved Reeses Peanut Butter Cup Minis. I froze the cake until ready for serving. It stays nice and cold which makes it MUCH easier to cut into slices.

Friday, September 30, 2011

Witches Brooms

A Witch comes to our house each year on the 30th of September to bring us Halloween Cheer, She swoops in a flash and leaves floating Hats that sparkle and shine, ITS HALLOWEEN TIME! This year she was feeling extra "witchy" and left us with some spooky brooms too.


Thanks to a good monsoon storm we had branches that broke off some trees in the neighborhood (pretty sure that landscaping crew thought I was crazy wanting the big branch) I used a small saw and cut "witch broom" size pieces and twigs. I let them bake in the AZ sun to dry out and to help the leaves fall off. Next  take some wire and tie your twigs to your broom stick (it would be easier with some help but I managed) Next  I bought the cheapest Black Spray Paint (I think it was primer) and paint them. I did a top coat of some black Glitter.


All I need is my "BROOM PARKING" sign!


The Hats are hung and the brooms taking flight its time to decorate for Halloween TONIGHT!

Wednesday, September 28, 2011

My Big Fat Italian Pumpkin!


Mr Safety must just adore me, bringing me gifts of pumpkins of the unique nature. I do love a good ugly pumpkin! I had to know, of what variety is this Beauty?
http://www.allaboutpumpkins.com/varieties.html

My pumpkins is a

Marina Di Chioggia


This Italian heirloom is a deep blue green in color like the ocean. The skin is knobby and reminds me of a sea urchin. It has a sweet orange flesh and is excellent in pies and baked goods.

So there you have it, no wonder I love it, its a pumpkin and is like the Ocean.....these are a few of my favorite things!


Friday, September 23, 2011

A Little Halloween Poof


Start with tissue paper (we like Walmart brand)
10 sheets of tissue is the magic number for a perfectly puffy ball (we tried less not so poof)
for a smaller ball cut sheets in half  start your fold on the "short side" so you get lots of folds


you will end up with a fan looking thing tie off the middle with a twist tie or pipe cleaner
CUT or round edges with a shape you like we did some round some pointy
One tissue sheet at a time pull your ball open, (be soft but if you get a tear you most likely wont be able to see it)

Hang with Ribbon, Tulle, or fishing line

All color's make Beautiful Poof Balls!

Saturday, September 10, 2011

Friday, August 12, 2011

Big Girl Room

Before


After


It has been busy at our house we have a new KINDERGARTNER this year  I wanted her to have a special big girl room. My friend had given me her Dads old furniture from when he was younger and I have be waiting for the inspiration to do some thing with it, well my inspiration comes in the form of Ms Malissa Cordova and her Entourage. I started with getting the furniture ready.  Cleaned it with TSP (a life saver) and sanding it down, primed it, sanded again, painted sand a bit more painted more and more. Then beat it up with sand paper and a dark brown glase.(you may need someone to hold your hand (MC) while you do this..its stressful to "ruin" or "antiquing" something you just slaved over making perfect!) Finished it with Polyurethane. It just lovely. The Room color is "Pineapple upside Down Cake" and The Poor Painting Crew had to paint 6 coats to cover the purple, with a tinted primer? Don't know why it took so long. It really was a group effort to surprise Gionni with her new room they did it in TWO days, (allot of the prep and shopping was done before) the kids helped paint the purple letters, find books for the room and Zee made the awesome tutu for the Guinea Pigs cage. Troy Boy added his touch in butterflies and nail guns. Pretty sure Kristy just got stuck with slave labor ;) and MC is the master designer (who is available for hire) Ms G was thrilled! "Its just what I dreamed of " she said when she saw it. I feel so loved for everyone that helped! It made for a special day for a special girl.
PS The budget was $100.00 (minus what is cost to redo the furniture)

Wednesday, July 27, 2011

paint + sweat = new room makeover!!

I had the oppurtunity to makeover my friend's little boys bedroom! I was more than thrilled! She was going out of town for 1 week...Saturday to Saturday...I procrastinated a bit and started Wednesday! We barely made it! She had the bed and the bedding, and my budget was $100. $100 goes faster than one might think...a few accessories and paint and I was spent. But that's when you get to be creative and resourceful. We reused frames she already had and a we used a bookshelf, that I was getting ready to donate, as the dresser. I may have gone over budget...just slightly. But it turned out great and he was SuPeR excited. And thats all that matters!! He loves cars, firetrucks, construction and trains. So we threw a little of everything in there to make a transportation room!


Tuesday, July 19, 2011

Repurposing

So, I saw an idea from Jen's website and I thought it was a great idea! My phone and modem are right next to each other on the counter and it's just kinda ugly. So I bought an UgLy tray at Ross for like $2.99. Steal of a deal! It was ugly brown floral, for some reason I have lost my before picture. But in this pic, you can kinda see the pretty flowers that it had on it, and picture it a real nice poopy brown color.
 I did a few quick coats with my favorite shade of blue!
It helped take my kinda boring mess in to something a bit more tamed and colorful.
 And I think I love it!
 Don't mind the unfinished countertops...one day this decade, they might get completed, and the ripped up wall next to the cabinets...let's just say, there is some moving of the cabinets happening around here!


Saturday, July 2, 2011

Happy 4th of July!

Thanks to Ms Kristy we had a busy craft day, I gave all the girls the "Glitter Treatment" on their toes and the Girls Tied their cute flip flops.

How did they make them?
$1.00 Wal Mart Flip Flops
6 inch pieces of ribbon (no that is not an Elf joke its really is 6")
 We found that if you don't double knot they come off and we should have put  "fray glue" on the ends so they will not fray.

Don't you want your kids to have fun like this at day care?

Thursday, June 16, 2011

Summer Wallet

I needed a new wallet,
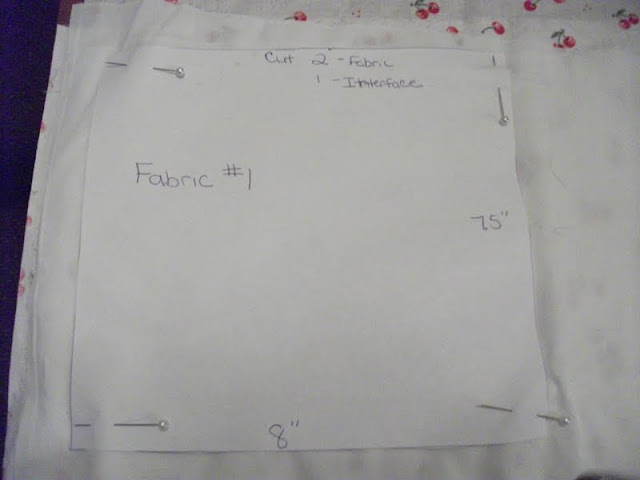
 PATTERN: I will be referring to these pieces as A, B, or C
A
 B
 C-
PLEASE NOT IT SHOULD BE CUT 4

MATERIALS NEEDED:
1/2 Yard of material (I used some scraps that I had, preferably two colors)
1/4 Yard medium interface
Pins
Sewing Machine
Iron


DIRECTIONS:
1-Cut out all fabric according to pattern. Iron if needed.
2- Start with Pattern C. Hopefully you cut 4, separate into to piles. With Right sides together sew 3 edges together leaving the bottom open. Right side out and set aside.

3-Take section B, separate into two piles: 1 interface, 2 fabric/pile. Place fabric right sides together, then the interface, pin, sew 3 edges, leaving the bottom open, right side out and set aside.


 4-Take 1 Piece of C and 1 Piece of B, center C on top of B. Sew 3 edges leaving top open, it is ok that the bottom is unfinished.

5-Take the second piece of C and sewing it on the same B piece as the other lining it up with the bottom. Leaving the top open and the raw edges sew together at the bottom.
6-Take Fabric from A, Place in the following order, fabric right side up, interface, fabric right side down to it is like a sandwich with the right side face out. Pin "B" to both sides of "A" as shown below. Sew the bottom and the edges together leaving the middle open. Right side out.
 
 7-If for any reason the you have an unfinished seem in the middle of your wallet tuck your seem inward and make a small stitch.


Congrats you are all finished!

Related Posts Plugin for WordPress, Blogger...